
Replace a screen door is one of those home fixes that sounds simple until the door starts fighting you. Maybe it no longer slides smoothly, the mesh is torn or sagging, or the frame feels slightly bent and refuses to sit right in the track.
In Ontario homes, especially in houses, townhomes, and condos with patio access, screen doors take a beating during spring and summer and often get neglected during winter storage months. This guide keeps it practical.
You’ll learn what “replacement” really means, how to tell repair vs replace, and what makes a DIY swap go smoothly. If your screen door connects to a bigger patio setup, it helps to think in terms of windows and doors as one system.
What Does It Mean to Replace a Screen Door?
Screen door “replacement” can mean a few different things, and this is where most beginners get tripped up. Some people only need to replace the mesh screen.
Others need a new roller set. And sometimes the whole door has to go because the frame is bent, the corners are loose, or the door no longer fits the opening properly. If you treat every problem as a full replacement, you’ll overspend.
If you treat a bent frame like a simple repair, you’ll waste time and still end up replacing it later. The goal here is to define what replacement actually covers, so your next steps feel obvious, and your purchase decision is clean.
Here’s what “replace a screen door” means in real homes:
- Replacing the screen vs replacing the door frame
If the frame is straight and the door rolls smoothly, you may only need new mesh and spline. This is the simplest fix and usually restores insect protection and visibility. But if the frame is twisted or the corners are separating, replacing only the screen won’t solve the real problem.
- Frame reuse vs full door replacement
Some screen doors are designed so the frame can stay while parts like rollers, handles, or the latch are replaced. Full replacement means buying a new door that matches the opening and track style.
- Sliding screen doors vs hinged screen doors
Sliding patio screens move on rollers inside a top and bottom track. When they fail, it’s often rollers, track debris, or a slightly warped frame. Hinged screen doors swing like a regular door and usually fail at the hinges, closer, or latch alignment.
The replacement method and measurements are different, so it’s important to identify the style before you shop.
- Retractable screen doors explained
Retractable screens roll into a housing and pull across the doorway. They’re clean-looking and popular in some Ontario homes, but replacement can be more specific because the cassette, track, and tension system need to match the original setup.
In many cases, you can replace the mesh cartridge or the whole unit, depending on wear.
If you’re clear on which “replacement” you actually need, everything gets easier from here, including measurement and avoiding the wrong purchase.
Now, before we touch tools or parts, it helps to understand why Ontario homes seem to go through screen doors faster than people expect.
Why Screen Door Replacement Is Necessary in Ontario Homes
In Ontario, screen doors are seasonal workhorses. They get heavy use when the weather warms up, then they sit through months of cold where tracks collect debris, frames shift slightly, and rollers stiffen up.
By spring, many homeowners notice the same pattern: the door scrapes, jumps the track, won’t close tightly, or the mesh looks tired and loose. Screen door replacement is not just cosmetic. When a screen door stops fitting properly, it stops doing its job, keeping bugs out, allowing airflow, and letting you enjoy the patio without fighting the door every time you step outside.
Below are the most common Ontario-specific reasons replacement becomes the smarter option.
- Seasonal wear from heavy spring and summer use
Screen doors are opened dozens of times a day in warm months. That constant movement wears down rollers, loosens corners, and weakens handles and latches, especially on basic builder-grade doors.
- Track damage and debris after the winter months
Over fall and winter, tracks collect grit, salt residue near entryways, and small debris. When spring arrives, the door starts dragging, wobbling, or derailing because the rollers can’t roll cleanly.
- Bent frames from everyday pressure and accidental bumps
Even a minor bend can cause poor alignment. A door that looks fine at first glance may have just enough twist to prevent smooth sliding or proper closure.
- Mesh breakdown and sagging over time
Sun exposure and repeated tension make the mesh lose shape. Torn screens are obvious, but sagging screens are equally frustrating because they look messy and can pop out of the frame.
- Insect control becomes urgent in warmer months
A screen door that doesn’t close flush or has gaps defeats the purpose. In Ontario summers, small openings quickly become a problem, especially near patios and backyard doors.
- Older patio systems are less forgiving
Older sliding door setups often have worn tracks or slightly uneven openings. A new screen door can still work, but only if it’s measured correctly and adjusted properly.
- Comparison: repair vs replacement
Repair makes sense when the frame is straight, and the problem is isolated, like worn rollers or torn mesh.
Replacement makes sense when multiple issues stack up, frame damage, poor fit, repeated derailment, or a door that never slides smoothly, even after adjustments.
Benefits of replacing instead of patching
- A new door restores smooth operation and proper closure
- A better fit reduces gaps that let insects in
- Fresh rollers and a straight frame reduce day-to-day frustration
Trade-offs to know upfront
- Replacement requires accurate measurements
- Some openings are non-standard, especially in older homes
- Cheap doors can bend again quickly if the quality is too low
If you’re nodding along thinking, “Yep, that’s exactly my screen door,” the good news is that this isn’t complicated once you measure correctly and choose the right style. Let’s now get into the practical part in a calm, step-by-step way so you can move forward without guessing.
Tools and Materials Needed to Replace a Screen Door
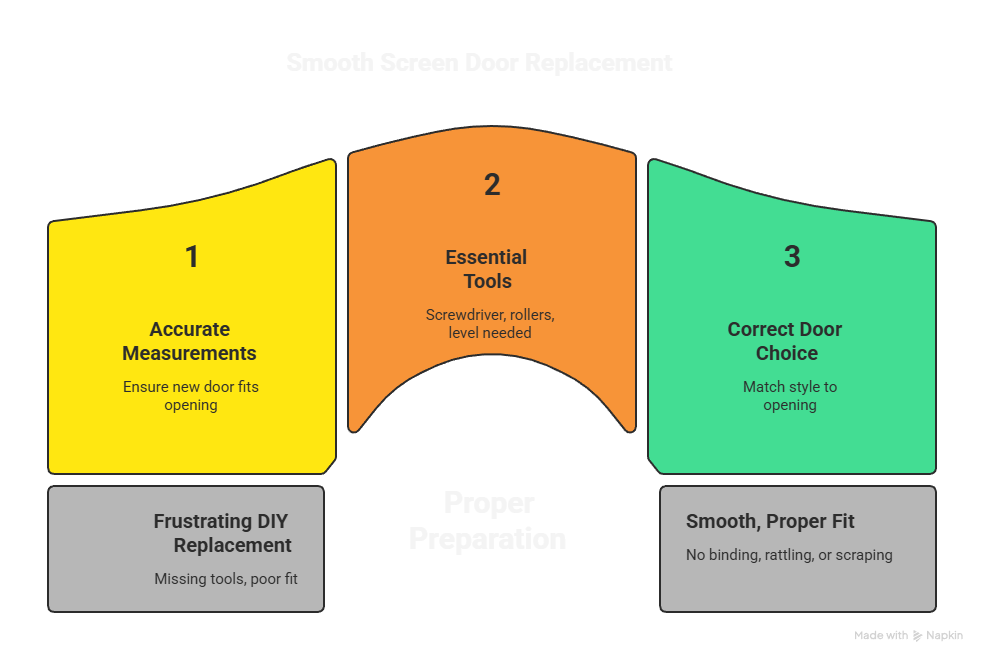
Before you remove anything, it’s worth slowing down and preparing properly. Replacing a screen door is not difficult, but it becomes frustrating when the right tools are missing or the replacement door doesn’t fit the opening.
Most problems people face during DIY screen door replacement come from rushing this stage.
In Ontario homes, where patio openings can vary slightly between builders and older homes may not be perfectly square, having the correct tools helps you make small adjustments that prevent binding, rattling, or poor closure later on.
Below is a practical list of tools and materials you’ll actually use, along with why each one matters.
- Measuring tape
This is the most important tool in the entire process. Accurate width and height measurements ensure the new screen door fits the opening and sits properly in the track.
- Screwdriver
Most screen doors are held in place with adjustable roller screws. A basic Phillips or flathead screwdriver is usually enough to loosen rollers, remove handles, and make alignment adjustments.
- Replacement rollers
If your frame is still usable but the door drags or jumps, new rollers can restore smooth movement. Rollers wear out over time, especially in doors that are used heavily during the summer.
- New screen door
If the frame is bent or damaged, a full door replacement is the better choice. Make sure the door style matches your opening, sliding, hinged, or retractable.
- Level
A level helps confirm the door sits evenly. A door that looks fine by eye can still be slightly off, causing it to slide open or scrape the track.
DIY-friendly vs professional tools
Most homeowners can complete this job with basic hand tools. Professionals may use specialty roller gauges or track straightening tools, but they’re not essential for standard replacements. What matters more than tools is patience and careful adjustment.
Taking a few minutes to gather the right tools makes the replacement process smoother and prevents damage to the door or track. With everything ready, you can now move confidently into the actual replacement steps without stopping halfway through to troubleshoot simple issues.
How to Replace a Screen Door in 5 Easy Steps
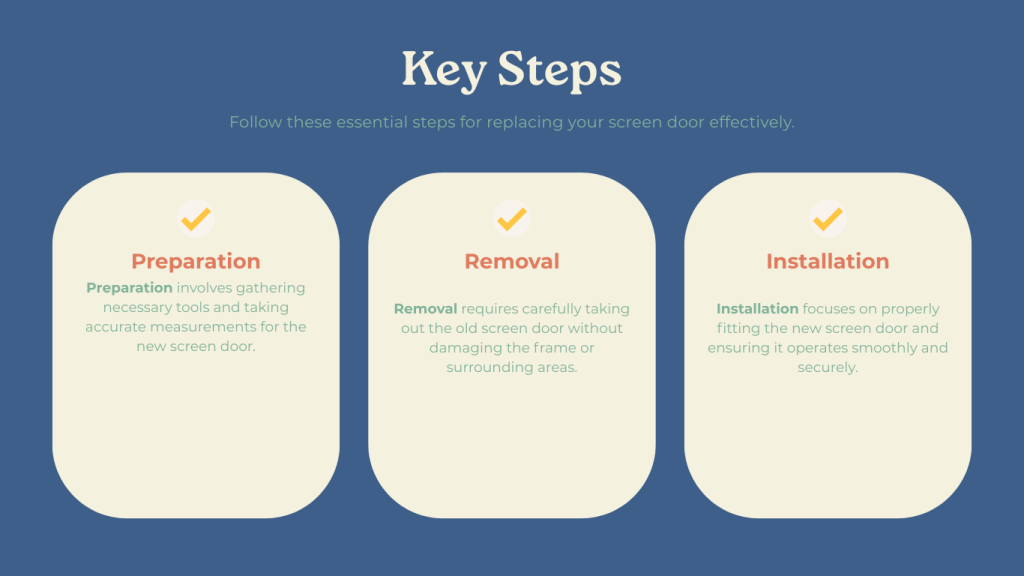
Replacing a screen door follows a logical sequence. Each step builds on the last, and skipping ahead usually leads to misalignment or a door that never quite feels right. In Ontario homes, especially with patio doors that see seasonal use, these steps help account for slight shifts in framing and wear in the track.
Treat this as a guided process rather than a race, and you’ll end up with a door that slides smoothly and closes properly.
Step 1: Remove the existing screen door safely
What to do
Lift the door slightly while pulling the bottom toward you to disengage it from the lower track. Some doors may need the roller screws loosened first to create clearance.
What to avoid
Don’t force the door out. Bending the frame during removal can damage the track or make measurements inaccurate.
Ontario-specific tip
If the door has been in place through multiple winters, the rollers may be stiff. Loosen adjustment screws gradually to avoid cracking older plastic rollers.
Step 2: Inspect the frame, track, and rollers
What to do
Clean the track, check for dents, and look at roller condition. Spin the rollers to see if they move freely.
What to avoid
Ignoring minor track damage. Even small bends can affect how the new door slides.
Ontario-specific tip
Salt and debris near patio entrances are common. A thorough cleaning improves performance more than most people expect.
Step 3: Measure the screen door opening correctly
What to do
Measure width and height in multiple spots. Use the smallest measurement to ensure proper fit.
What to avoid
Measuring only once or relying on the old door’s size. Openings change slightly over time.
Ontario-specific tip
Older homes may have openings that are not perfectly square. Small adjustments during installation matter.
Step 4: Install and align the new screen door
What to do
Set the top of the door into the upper track first, then guide the bottom into place. Adjust rollers so the door sits evenly.
What to avoid
Over-tightening rollers. This can cause binding and uneven wear.
Ontario-specific tip
Aim for a snug fit without pressure. Seasonal expansion can affect how tight the door feels later.
Step 5: Adjust wheels and test smooth operation
What to do
Slide the door back and forth several times. Adjust rollers until movement feels smooth and the door closes fully.
What to avoid
Stopping adjustments too early. Small tweaks make a big difference in daily use.
Ontario-specific tip
Test the door on a cooler day if possible. A door that works smoothly in cooler conditions will perform well through summer.
Once the door moves easily and closes without gaps, you’re nearly done. If the process felt straightforward, you’ve handled a common home task confidently.
If it felt more complicated than expected, that’s normal, too. In some cases, especially when the door ties into larger patio systems or worn frames, stepping back and reassessing the bigger windows and doors setup can help guide the next decision.
How Do You Measure a Screen Door for Replacement Correctly
Measuring is where most screen door replacements go wrong, even for careful homeowners. It’s not because measuring is hard, but because people assume screen doors are “standard size” and only check one spot. In real Ontario homes, openings can be slightly out of square, especially in older houses, and tracks can wear over time.
A screen door that is even a little too tall will scrape and jam. A door that is too narrow will rattle, leave gaps, and let bugs in. The goal is to measure in a way that accounts for small differences so you buy a door that fits the opening you actually have, not the opening you wish you had.
Below is a simple measurement method that works for beginners and prevents expensive returns.
- Width measurement
Measure the inside width of the opening where the screen door sits, not the glass door. Take three measurements: top, middle, and bottom. Use the smallest number. - Height measurement
Measure from the top track channel down to the bottom track channel. Take measurements on the left, center, and right side. Use the smallest number again. - Track depth
Check how deep the top track channel is. Some doors need enough depth to lift into the track during installation. If the depth is shallow, you may need a door designed for that track style. - Top vs bottom differences
Some openings are slightly wider at the top than at the bottom due to settling. That’s why three measurements matter. A door that fits one end may bind at the other. - Measure the door thickness if needed
Most sliding screens are of similar thickness, but if your track is tight, the thickness can affect sliding clearance. - Confirm handle clearance and latch position
Especially in condos or tight patio setups, confirm the handle won’t interfere with the main door handle or frame. - Write it down and label it
It sounds obvious, but many wrong purchases happen because measurements weren’t written clearly, or inches and fractions were mixed up.
Common measuring mistakes to avoid
- Measuring the old door instead of the opening
- Measuring only once
- Using the largest measurement instead of the smallest
- Forgetting to check the track depth
- Ignoring the bottom track wear that reduces usable height
If measuring still feels uncertain, don’t guess. A small fit issue becomes a daily annoyance.
Once your measurements are locked in, you’ll also start noticing something else: replacing a simple hinged screen door is not the same as replacing a sliding patio screen. That difference matters more than most people expect.
Replacing a Sliding or Patio Screen Door: What’s Different
Sliding patio screen doors are the most common type in Ontario homes, and they also cause the most frustration when they wear out.
Unlike hinged screens, a sliding screen depends heavily on roller condition, track cleanliness, and how square the opening is. Many homeowners replace the door and wonder why it still doesn’t glide properly, only to discover the track is damaged or the rollers were never adjusted correctly.
Condos and townhomes add another layer, because you may be limited to certain door styles or colours that match the building.
Below is a quick comparison that simplifies what’s different about sliding patio screens so you know what to focus on.
Sliding screen door replacement checklist:
| What matters most | Why is it different for sliding screens | What to check before buying |
| Rollers and wheels | Sliding screens rely on wheels for every movement | Roller wear, stiffness, cracked wheels |
| Track condition | A damaged track ruins performance even with a new door | Dents, debris buildup, worn grooves |
| Frame straightness | Slight bends cause scraping and poor closure | Corner looseness, twisting |
| Condo rules | Some buildings restrict replacements | Size limits, colour, hardware style |
| Latch alignment | Sliding doors need proper closure alignment | Latch position and handle clearance |
A simple roller swap can sometimes fix a sliding screen door without full replacement, but only if the frame is still straight.
If the track is bent or worn, replacement may still feel rough unless the track is cleaned or repaired. Once you understand these differences, the next decision becomes easier: do you actually need a full replacement, or can a targeted repair solve it?
Can You Repair Instead of Replace a Screen Door
Yes, in many cases you can repair a screen door instead of replacing it, and it’s often the smarter move when the frame is still in good condition.
The trick is knowing what kind of repair actually solves the problem. A torn screen is usually a screen-only fix.
A door that drags may have rollers. But a door that constantly pops off the track, won’t align, or feels twisted is usually past the point of minor repairs. In Ontario, where screen doors may be stored, reinstalled, and used seasonally, these issues stack up over time.
Below is a simple comparison to help you decide quickly.
Repair vs replace comparison:
| Option | Best when | Benefits | Trade-offs |
| Screen replacement only | The frame is straight, the mesh is torn or sagging | Lowest cost, quick improvement | Doesn’t fix sliding or alignment problems |
| Roller replacement | Door drags or feels rough, frame is still solid | Restores smooth sliding | It won’t help if the track is damaged or the frame is bent |
| Full door replacement | The frame is bent, the corners are loose, poor fit | Fresh fit, smoother operation, fewer gaps | Requires accurate measurements and proper adjustment |
If you’re unsure, start by checking the frame. If it’s straight and the door sits well in the track, repairs usually work. If the frame is even slightly twisted, repairs often become temporary and frustrating.
The good news is that once you’ve measured properly and understood your door type, making the repair vs replace decision becomes much simpler and far less risky.
How Much Is a Screen Door Replacement in Ontario
Screen door replacement costs in Ontario are usually more affordable than homeowners expect, but the final number depends on what you’re actually replacing.
A simple screen swap is very different from replacing an entire sliding screen door frame, and professional installation adds another layer. Most people get surprised not by high prices, but by how much costs vary depending on door size, roller quality, and fit issues.
The goal here is not to push a budget up or down, but to give you realistic ranges so you can decide confidently instead of guessing.
Here’s a clear way to think about screen door replacement costs in Ontario homes.
- DIY screen-only replacement range
Replacing just the mesh typically costs the least. Screen material and spline are affordable, making this a good option when the frame is still straight and functional. - DIY full-screen door replacement range
A complete sliding screen door purchased off the shelf costs more than mesh but remains budget-friendly. Quality, frame strength, and roller durability affect price. - Professional screen door replacement range
Professional replacement includes measuring, fitting, and adjustment. This is helpful when openings are not square or doors never seem to slide properly after DIY attempts. - Roller and hardware upgrades
Higher-quality rollers cost more upfront but dramatically improve smoothness and lifespan, especially in heavily used patio doors. - Non-standard sizes
Custom or oversized doors cost more due to limited availability and special ordering. - Condo or townhouse considerations
Some buildings require specific door styles or colours, which can affect pricing slightly. - Track condition and minor repairs
If the track needs cleaning or adjustment, that can influence labour time when hiring a professional.
In general, screen door replacement is a low-risk investment that pays off immediately in daily comfort and usability. Knowing the realistic ranges helps you avoid overpaying while still choosing components that won’t fail after one season.
Common Screen Door Replacement Mistakes to Avoid
Even a simple project like screen door replacement can go wrong when a few basic steps are skipped. These mistakes don’t just cause frustration; they often lead to repeat purchases or the door never working quite right. Most of them are easy to avoid once you know what to watch for.
- Measuring wrong
Measuring once or measuring the old door instead of the opening is the most common and costly mistake. - Buying cheap rollers
Low-quality rollers flatten quickly and undo all the effort of replacing the door. - Ignoring frame damage
A bent frame will never slide smoothly, no matter how many parts you replace. - Forcing a misaligned door
Forcing a door into the track bends the frame and damages rollers immediately. - Skipping track cleaning
Dirt and debris in the track reduce performance even with a brand-new door. - Assuming all doors are standard size
Many Ontario homes, especially older ones, have slightly non-standard openings.
These mistakes mirror issues homeowners often face during larger upgrades, which is why guides like window replacement mistakes can be surprisingly helpful even for smaller projects.
Avoiding these errors keeps screen door replacement simple instead of repetitive.
When It Makes Sense to Hire a Professional
There’s no shame in calling a professional when a screen door replacement stops being straightforward. DIY works well when the opening is square, the track is in good shape, and the door fits as expected.
But once alignment issues or frame damage enter the picture, professional help often saves time and frustration. The key is knowing when you’ve crossed that line.
Hiring a professional makes sense when:
- Frames are damaged or bent, and repairs haven’t helped
- The screen door integrates with a patio door system, and clearances are tight
- DIY attempts still result in poor sliding or gaps
- Measurements feel uncertain, and you want it done once, correctly
Professional installers approach screen doors as part of a larger entry system, not a standalone part. This is the same mindset used in window replacement service projects.
For homeowners in Durham Region, local expertise also matters. Proper fitting and adjustment are standard practice with Oshawa installation service teams.
Sometimes the smartest DIY decision is knowing when to stop and let experience take over.
Final Verdict
Screen door replacement sits right on the line between an easy DIY task and a job that benefits from professional hands. If your frame is straight, the track is clean, and your measurements are accurate, DIY replacement can be satisfying and cost-effective.
If the door has never slid properly, feels twisted, or keeps popping off the track, professional replacement usually delivers better results with less frustration.
The right choice isn’t about skill level. It’s about the condition of your door and how much time you want to invest. Either way, understanding the process puts you in control.
Frequently Asked Questions
How do you replace a screen door?
Remove the old door, inspect the track and rollers, measure the opening carefully, install the new door, and adjust the rollers until it slides smoothly.
Can you replace just the screen?
Yes. If the frame is straight and solid, replacing only the screen mesh is often enough.
How much does screen door replacement cost?
Costs vary based on whether you replace the screen, the entire door, or hire a professional. Most options are affordable compared to larger home upgrades.
Are sliding screen doors standard size?
Many are similar, but openings vary. Always measure the opening, not the old door.
Should I hire a professional?
If the door doesn’t fit well, won’t slide properly, or connects to a larger patio system, professional help is often worth it.